Bài viết trả lời 3 câu hỏi:
- Làm thế nào điều hướng nhiều Fragment trong 1 màn hình Activity?
- Hiệu ứng khi open/close.
Project sẽ demo việc:
- Tại màn hình MonsterFragment - Muốn mở màn hình MoneyFragment (màn hình con) - Demo cách 1
- Tại màn hình SlugFragment - Muốn mở màn hình SlashFragment (màn hình con) - Demo cách 2
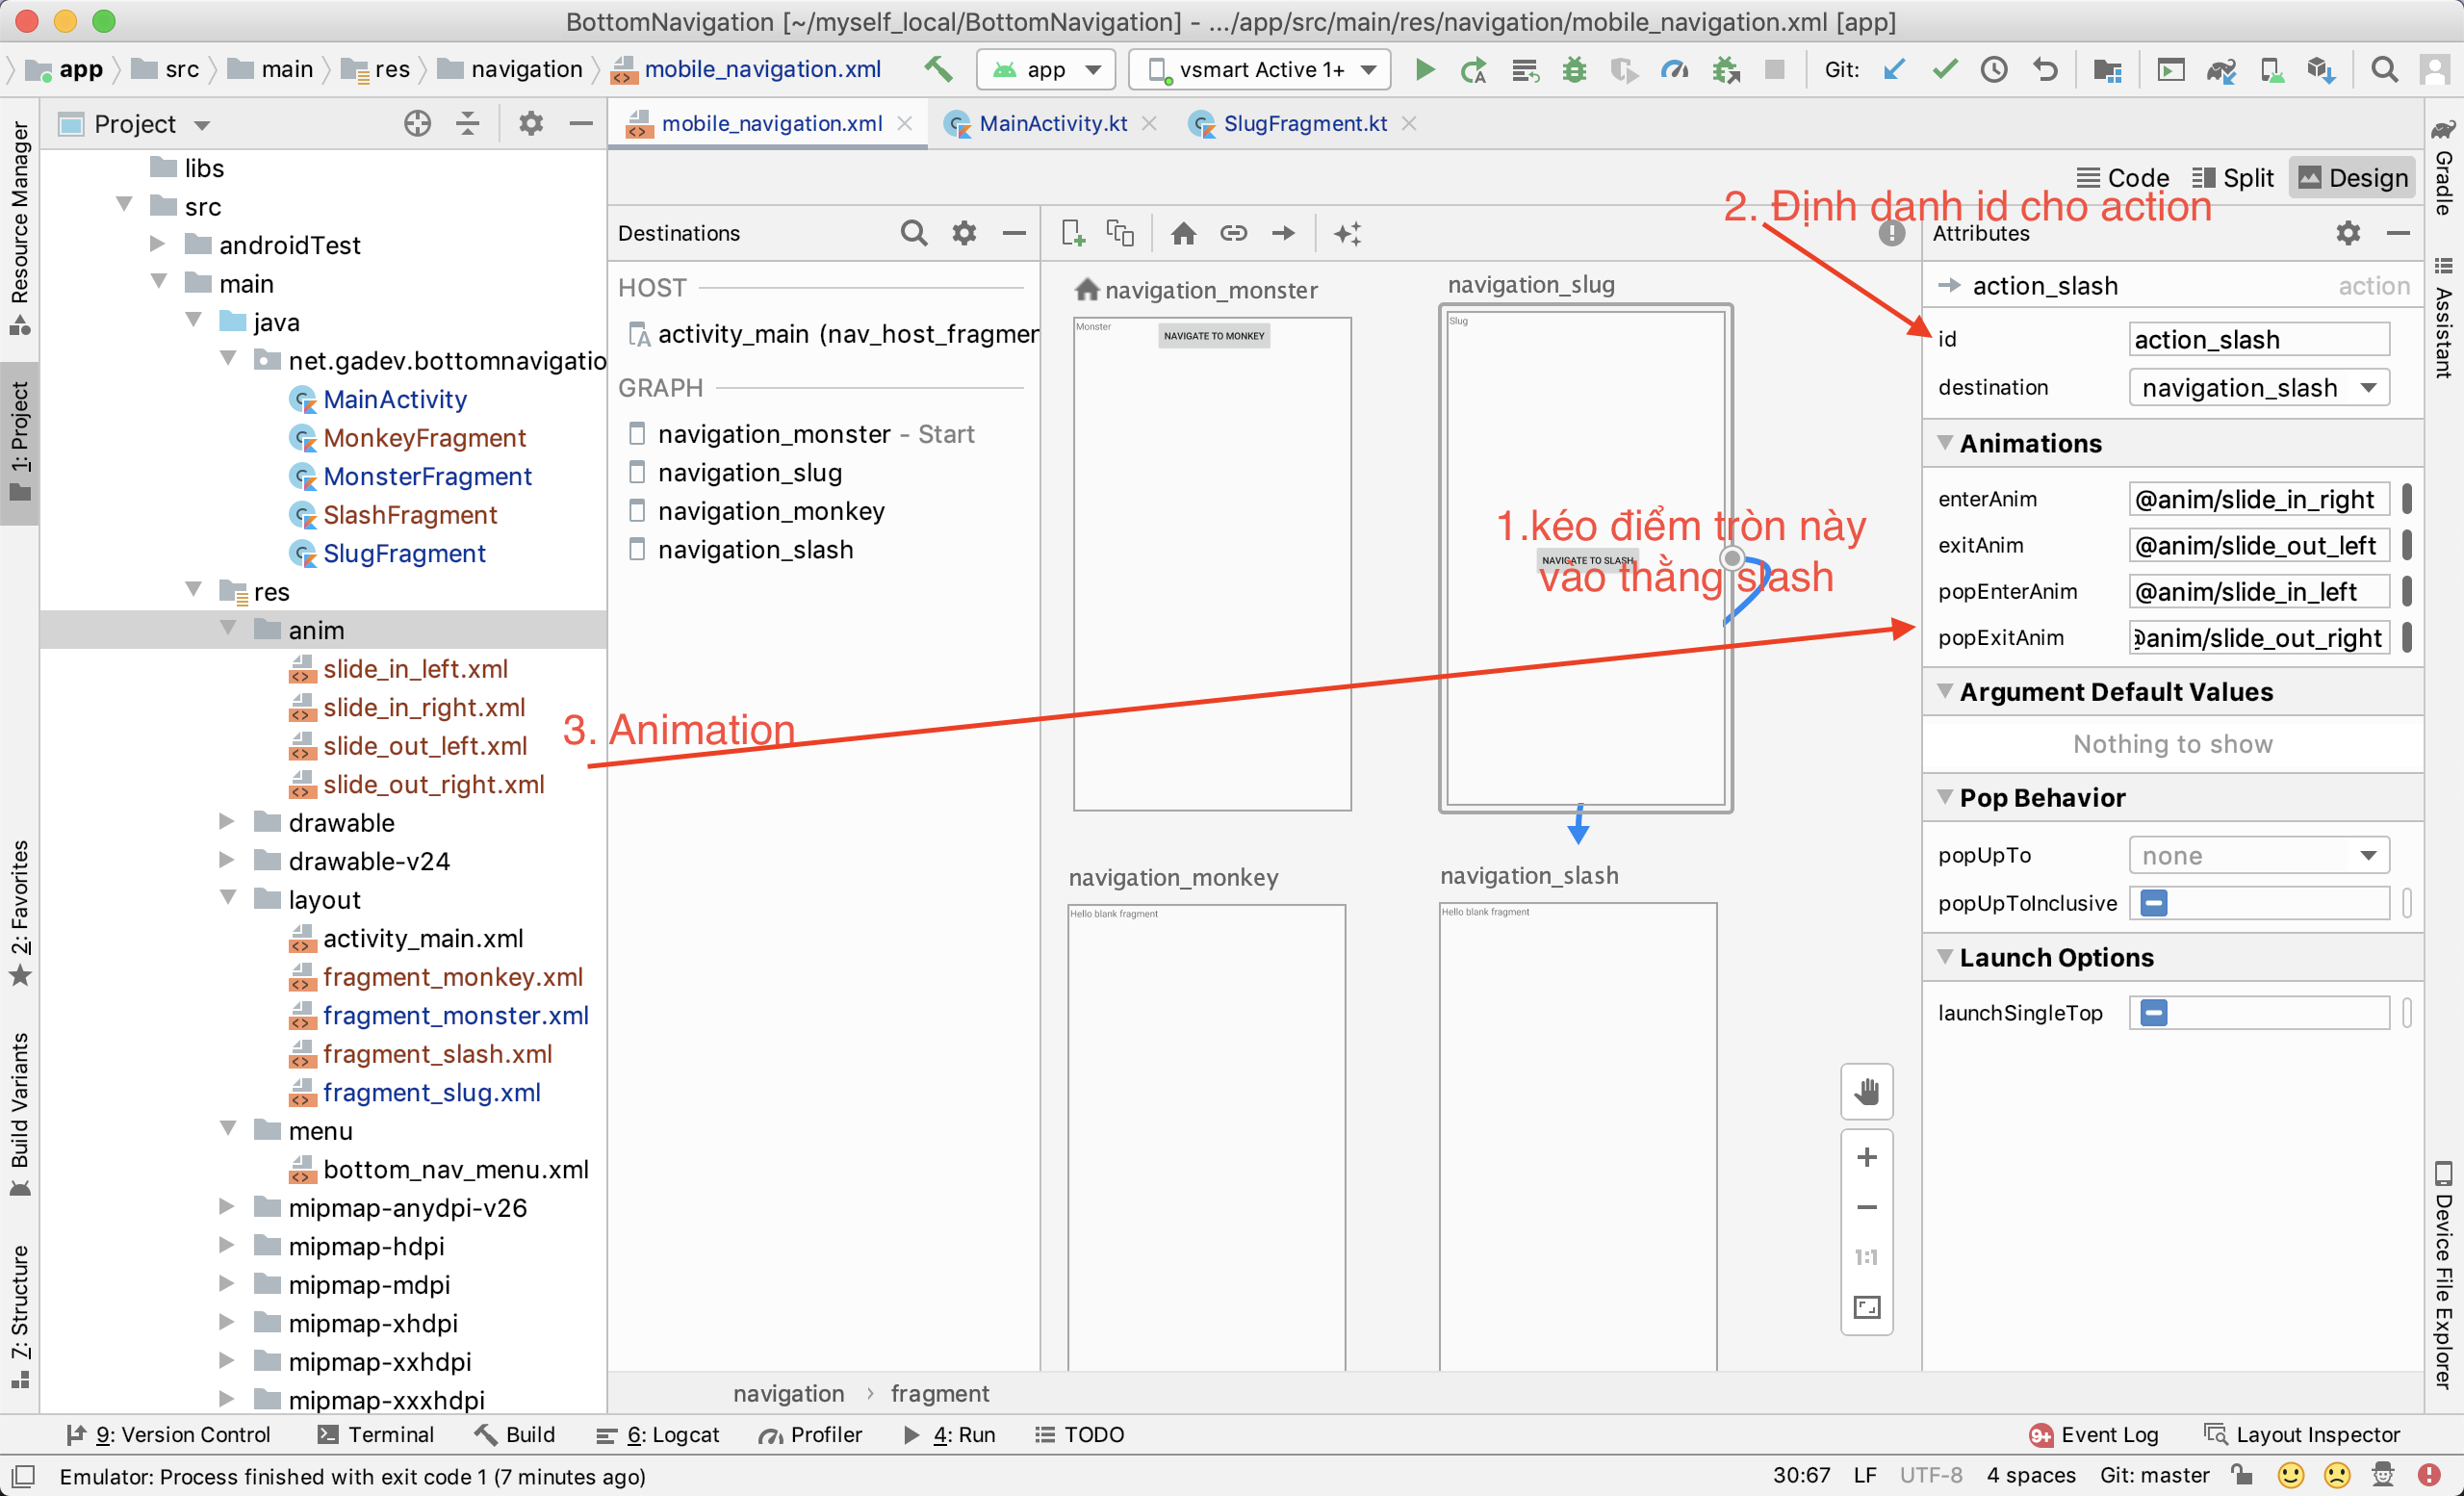
Bước 1: Tạo thêm Destination cho 2 fragment mới tương ứng vào file mobie_navigation.xml - file này gọi là Navigation Graph
Ví dụ ở demo sẽ là: navigation_monkey và navigation_slash
Bước 2: Khai báo id navigation mới vào AppBarConfiguration tại MainActivity
Bước 3: Điều hướng có 2 cách:
- Sử dụng NavController
- Dùng Navigation Action
#
MonsterFragment điều hướng sang MonkeyFragment
1 | override fun onViewCreated(view: View, savedInstanceState: Bundle?) { |
navigateToMonkey : là id của Button trong XML, nếu bạn dùng
#
Code điều hướng từ Slug sang Slash trong SlugFragment
1 | override fun onViewCreated(view: View, savedInstanceState: Bundle?) { |
Source code có thể tải về tại Github